When I first looked at creating a GTK4 C# application using Gir.Core there was no documentation so I had to learn it through trial and error and looking at GTK in other programing languages. When I got my head around how to do this I created some tutorials and contributed them to the Gir.Core project.
This is dual posted here so people can see content that I have created over time. You can find the official Gir.Core documentation at https://gircore.github.io/.
Please consider expanding the tutorials further if you go on to use it for creating applications.
When learning GUI frameworks like GTK, QT and wxWidgets it is common to teach the basics using code to make the learning experience easier. In a real life GTK application you will probably want to create a ui file using either GTK Builder XML or Blueprint to build the UI.
On the internet you will often see Glade mentioned for building GUIs in a user friendly wysiwyg editor. Glade does not work with Gtk 4 however there is a new project Cambalache which will build GUIs in a similar way to the old Glade project that was used in GTK 2/3.
If you want to use Blueprint to build your UI then you can use Workbench to see a preview as you write the blueprint.
Hello World Gtk Tutorial
In this hello world tutorial you will learn how to build a basic C# Gtk Application with a single Gtk Button widget inside it.
We will begin by creating a GtkTutorials directory to contain the Gtk tutorials you do and create the HelloWorld project using the command line.
mkdir GtkTutorials
cd GtkTutorials
dotnet new console -f net8.0 -o HelloWorld
dotnet new gitignore
dotnet new sln
dotnet sln add HelloWorld/
The above commands will create a new console project, a gitignore file and a solution file for the project with the HelloWorld project added to the solution file so that people using ide’s can open the project easily. As you follow more Gtk tutorials you can create the projects in the GtkTutorials directory by using dotnet new console -f net8.0 -o NewProject and add the projects to the solution file by using dotnet sln add NewProject to have multiple projects in the same solution file.
Next we will download the GirCore.Gtk-4.0 nuget package into the project.
You can check for newer versions by visiting the nuget website at https://www.nuget.org/packages/GirCore.Gtk-4.0/#versions-body-tab.
cd HelloWorld
dotnet add package GirCore.Gtk-4.0 --version 0.5.0
The above commands will change to the HelloWorld directory then add the GirCore.Gtk-4.0 package to the HelloWorld.csproj file.
We will now create a new class file to use to make the HelloWorld window in Gtk. This will later be loaded from the Program.cs file.
dotnet new class -n HelloWorld
Next open the HelloWorld directory in your favourite code editor or ide so we can edit the HelloWorld.cs and Program.cs files.
The code is commented to tell you what is happening. In addition to these comments the highlighted lines will be discussed further after the code block to give you more information.
Filename: HelloWorld.cs
 1namespace HelloWorld
 2{
 3    // Define a class named HelloWorld that extends Gtk.Window.
 4    // Gtk.Window represents a top-level window in a GTK application.
 5    public class HelloWorld : Gtk.Window
 6    {
 7        // Constructor for the HelloWorld class.
 8        // This method sets up the window and its contents.
 9        public HelloWorld()
10        {
11            // Set the title of the window.
12            Title = "Hello World App";
13
14            // Set the default size of the window to 300 pixels wide and 30 pixels tall.
15            // This is the initial size when the window is first displayed.
16            SetDefaultSize(300, 30);
17
18            // Create a new button widget.
19            // Gtk.Button is a clickable UI element.
20            var helloButton = Gtk.Button.New();
21
22            // Set the text label displayed on the button.
23            helloButton.Label = "Say Hello";
24
25            // Add margins around the button to create spacing from the edges of the window.
26            // Margins are specified in pixels.
27            helloButton.SetMarginStart(10);  // Left margin
28            helloButton.SetMarginEnd(10);    // Right margin
29            helloButton.SetMarginTop(10);    // Top margin
30            helloButton.SetMarginBottom(10); // Bottom margin
31
32            // Add the button to the window.
33            // The `Child` property represents the main widget contained in the window.
34            // Here, we set the button as the only child of the window.
35            // In a real application you would set the child to be one of the Gtk Layout widgets
36            // so you can have multiple widgets in the window.
37            Child = helloButton;
38
39            // Attach an event handler to the button's "OnClicked" event.
40            // This event is triggered when the user clicks the button.
41            helloButton.OnClicked += (_, _) =>
42            {
43                // Print "Hello World!" to the console when the button is clicked.
44                Console.WriteLine("Hello World!\n");
45            };
46        }
47    }
48}
Line 37:
On line 37 you set the Child of the HelloWorld Gtk.Window to be the HelloWorld Gtk.Button.
It may be easier to understand visually by looking at the diagram below.
  graph TB
    parent[HelloWorld Gtk.Window]
        subgraph parent [HelloWorld Gtk.Window]
            n1[helloButton Gtk.Button]
        end
As you can see the window is entirely made up of the helloButton Gtk.Button widget. In a real application you will use a Layout Widget like the Gtk.Box widget to have multiple widgets inside the window.
Filename: Program.cs
 1// Create a new GTK application instance.
 2// "com.example.helloworld" is the unique application ID used to identify the app.
 3// The application ID should be a domain name you control.
 4// If you don't own a domain name you can use a project specific domain such as github pages.
 5// e.g. io.github.projectname
 6// Gio.ApplicationFlags.FlagsNone indicates no special flags are being used.
 7var application = Gtk.Application.New("com.example.helloworld", Gio.ApplicationFlags.FlagsNone);
 8
 9// Attach an event handler to the application's "OnActivate" event.
10// This event is triggered when the application is started or activated.
11application.OnActivate += (sender, args) =>
12{
13    // Create a new instance of the main application window.
14    var window = new HelloWorld.HelloWorld();
15
16    // Set the "Application" property of the window to the current application instance.
17    // This links the window to the application, allowing them to work together.
18    window.Application = (Gtk.Application) sender;
19
20    // Show the window on the screen.
21    // This makes the window visible to the user.
22    window.Show();
23};
24
25// Start the application's event loop and process user interactions.
26// RunWithSynchronizationContext ensures proper thread synchronization for GTK.
27// The "null" parameter takes the arguments from the commandline. As there are no arguments
28// supported in this tutorial the parameter is not filled and thus null.
29return application.RunWithSynchronizationContext(null);
Run the HelloWorld Application:
Now we have completed the code for the hello world tutorial we can run the project.
dotnet run
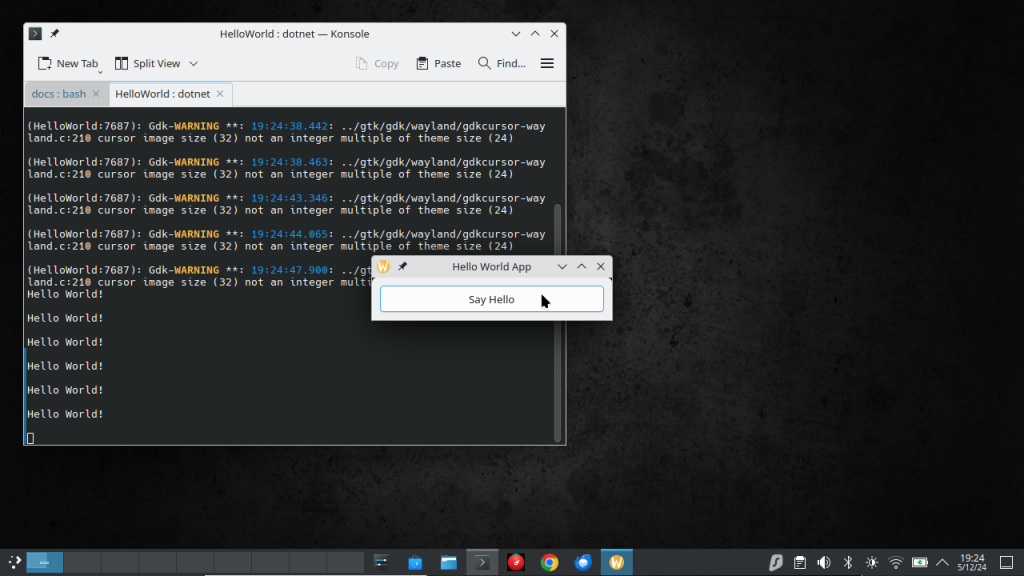
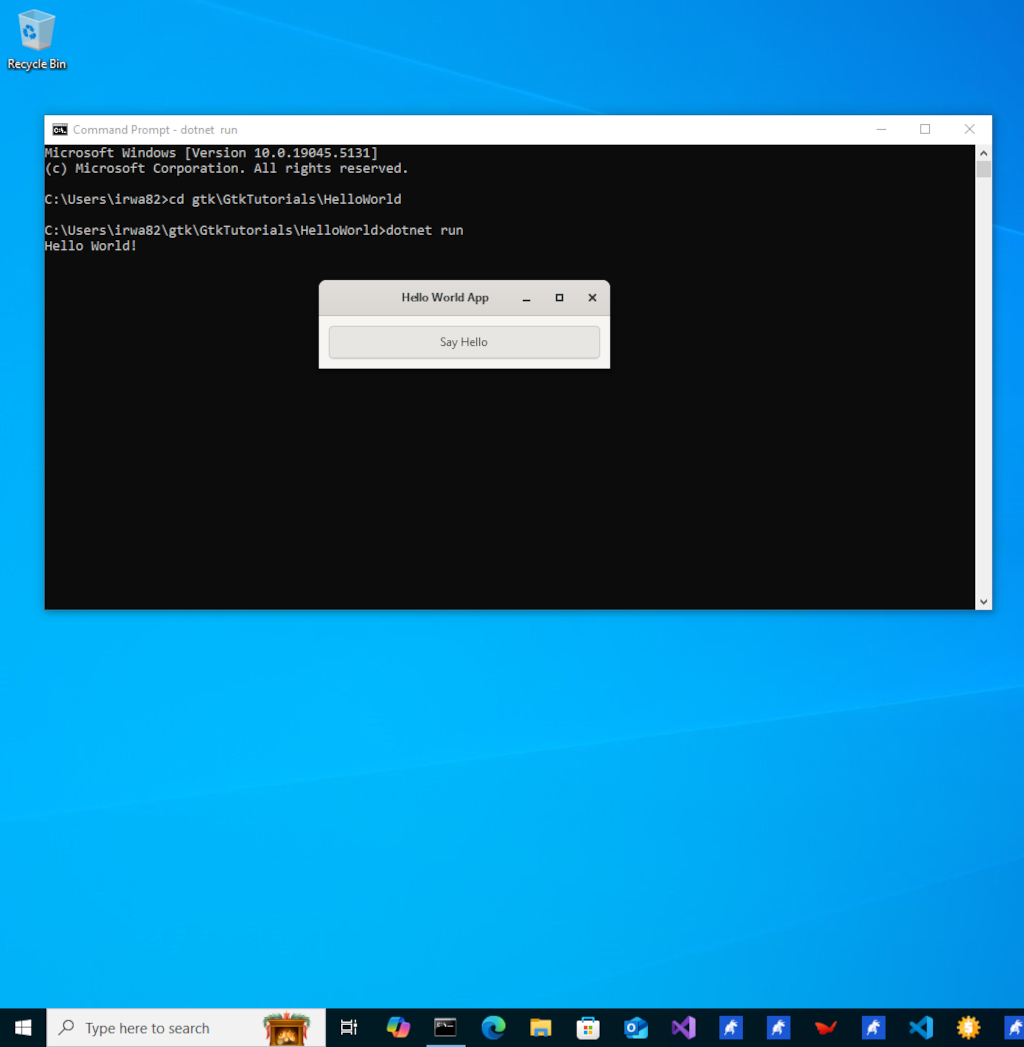
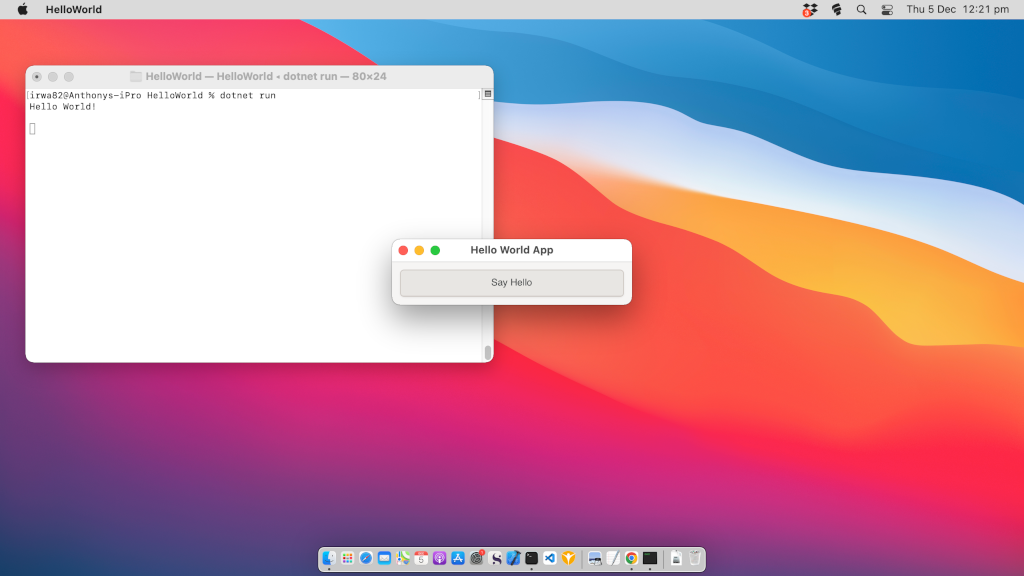
If you have entered the code correctly and have the Gtk 4 runtime libraries installed correctly on your computer then you will see the Hello World application window appear on the screen.
Try resizing the window to see that the helloButton Gtk.Button widget takes up the entire window with a 10 pixel margin around it.
Screenshots
There are two blog posts in this series:
Latest Blog Posts:
How to setup a web development environment on Linux that has dynamic domains for your web applications
Learn how to configure a professional local web development environment on Linux with dynamic wildcard domains (*.test, *.local), automatic SSL certificates, and Nginx reverse proxy for seamless multi-project development.
How to do backups with rsync on Linux
Comprehensive guide to using rsync for backups on Linux systems
How to use GitHub Actions Workflow to Deploy Your Website using rsync automatically
Learn how to automate your Hugo website deployment with GitHub Actions and rsync for fast, secure updates.
How to add Lunr.js Search to Your Hugo Website
Learn how to integrate Lunr.js for fast, client-side search functionality in your Hugo static site.
How to use Github Actions to Deploy a Hugo Website to GitHub Pages automatically
In this post, I'll walk you through a complete GitHub Actions workflow for building and deploying a Hugo static website to GitHub Pages. This setup is ideal for developers who want a free, automated hosting solution for their blogs, documentation sites, or portfolios. It replaces manual uploads with a push-to-deploy pipeline.
How to Setup Hugo Admonitions (Markdown Callouts in Hugo)
By adding Hugo Admonitions to your website so you can easily add stylish note bars for things like tips, warnings, cautions, important information etc. You can do this quickly and easily directly using markdown.
How to setup Syntax Highlighting with Copy Button using Hugo
In this post, I’ll show you how to add syntax highlighting and a ‘Copy’ button to your Hugo code blocks using a single self-contained JavaScript file. You’ll be able to highlight code in multiple languages, optionally show line numbers, and let users copy snippets with one click.
How to strip unused CSS from your CSS files and Minify them into a single CSS file using Hugo
Using Hugo with PostCSS and PurgeCSS allows you to automatically remove unused CSS and bundle all your styles into a single minified file for production, improving page load times and performance.
Make an application always load as a floating window in Cosmic Desktop
Make an application always load as a floating window in Cosmic Desktop
Why I migrated from Wordpress to Hugo
My reasons for migrating from Wordpress to the Hugo static website generator